Attaching floor joists to a sill plate is a critical step in building a sturdy floor structure. Proper attachment ensures the floor can support weight and resist movement. Using galvanized steel joist hangers provides strong, reliable connections that prevent wood from splitting.
Secure the hangers with nails or screws for maximum stability. Accurate spacing and leveling of the joists help distribute loads evenly, reducing stress on the framework. This method offers durability and longevity, making it a preferred choice for many builders. Proper installation can prevent future issues, ensuring a safe and stable floor system.
What Are Floor Joists?

Floor joists are the horizontal structural members that support the floor. They are crucial for distributing weight and providing stability. Typically made from wood or steel, floor joists span the space between walls or beams.
Key features of floor joists include:
- Material: Commonly made from wood, engineered wood, or steel.
- Spacing: Usually spaced 16 inches apart, but can vary.
- Size: Sizes range from 2×6 to 2×12, depending on the load requirements.
- Orientation: Installed perpendicular to the floor surface.
What Is A Sill Plate?
A sill plate, also known as a sole plate, is a horizontal piece of lumber placed at the bottom of a wall frame. It serves as the connection point between the floor joists and the foundation. The sill plate is essential for anchoring the structure to the foundation and providing a level base for the floor system.
Key features of a sill plate include:
- Material: Usually pressure-treated wood to resist moisture and decay.
- Size: Commonly 2×6 or 2×8 lumber.
- Anchor Bolts: Secured to the foundation with anchor bolts for stability.
- Sealing: Often sealed with a gasket or foam to prevent air and moisture infiltration.
Here is a table that outlines the typical sizes and materials for sill plates:
| Sill Plate Size | Material | Purpose |
| 2×6 | Pressure-treated wood | Standard residential use |
| 2×8 | Pressure-treated wood | Heavy-duty applications |
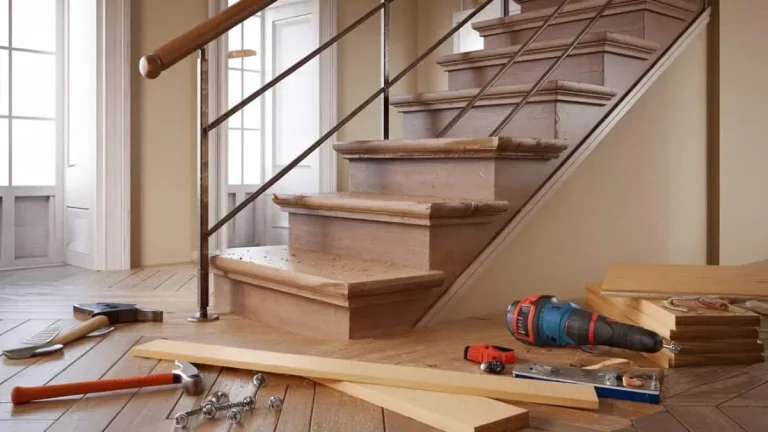
Tools And Materials Required
Attaching floor joists to a sill plate is a crucial step in building a sturdy floor structure. Ensuring you have the right tools and materials is essential for a successful project. We will guide you to gather everything you need to get started.
Tools Required
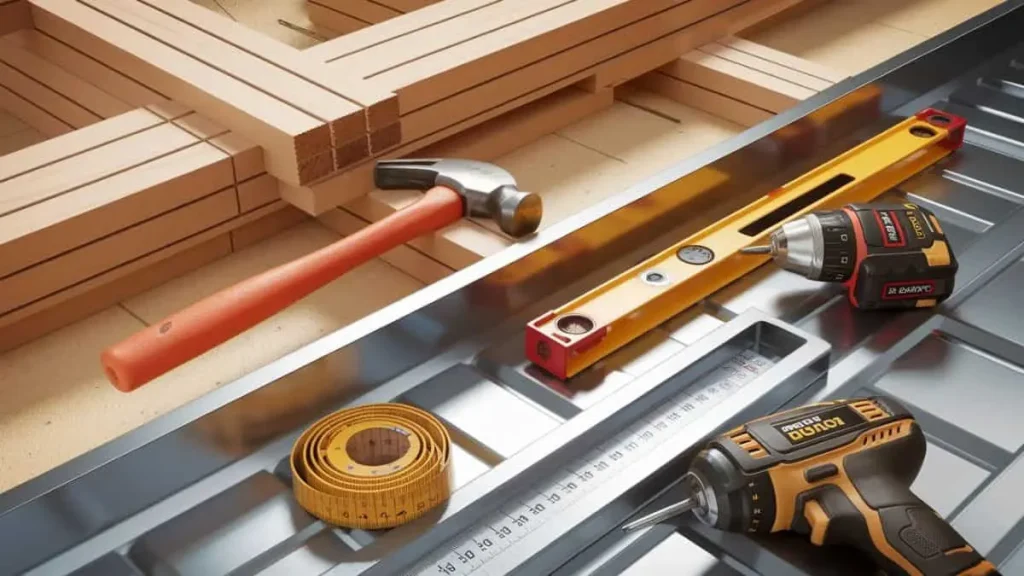
Having the right tools makes attaching floor joists to the sill plate much easier and more efficient. Below is a list of essential tools you’ll need:
- Hammer: A good claw hammer will help you drive nails into the wood.
- Measuring Tape: Accurate measurements are crucial for proper alignment.
- Speed Square: This tool helps ensure your cuts and angles are precise.
- Level: A level ensures your joists are even and properly aligned.
- Power Drill: Useful for drilling pilot holes and driving screws.
- Saw: You’ll need a circular saw or hand saw for cutting the joists to length.
- Chalk Line: Helps mark straight lines for accurate cuts and placement.
Materials Required
Using the right materials is just as important as having the right tools. Below is a list of materials you’ll need:
- Floor Joists: Choose joists that are the correct size and type for your project.
- Sill Plate: This is the wood piece that sits on top of the foundation walls.
- Nails or Screws: Use galvanized nails or screws to prevent rusting.
- Joist Hangers: These metal brackets support the joists and keep them in place.
- Construction Adhesive: Provides extra strength and stability.
- Shims: Useful for leveling the joists if the foundation is uneven.
Attaching Floor Joists To Sill Plate
Attaching floor joists to a sill plate is a crucial step in building a strong and stable floor frame. The process involves measuring, cutting, positioning, and nailing the joists securely to ensure the floor can support the weight above. We will walk you through each step, providing tips and tricks to make the job easier and more efficient.
Measuring And Cutting Joists
Accurate measurement and precise cutting are key to a solid floor frame. Begin by measuring the span where the joists will be installed. Use a measuring tape to determine the length from one side of the sill plate to the other.
Once you have the measurements, mark the cutting lines on the joists. Make sure the marks are straight and clear. Use a pencil and a carpenter’s square for precision. It’s important to cut each joist to the exact length to ensure they fit snugly.
- Measure the span with a tape measure.
- Mark the cutting lines using a pencil and carpenter’s square.
- Ensure the marks are clear and precise.
Next, use a saw to cut the joists along the marked lines. A circular saw or a miter saw works best for this task. Ensure you wear safety glasses and gloves while cutting to protect yourself from debris and sharp edges.
| Tool | Purpose |
| Measuring Tape | Measure the span for joists |
| Carpenter’s Square | Mark straight cutting lines |
| Circular or Miter Saw | Cut joists to length |
Positioning The Joists
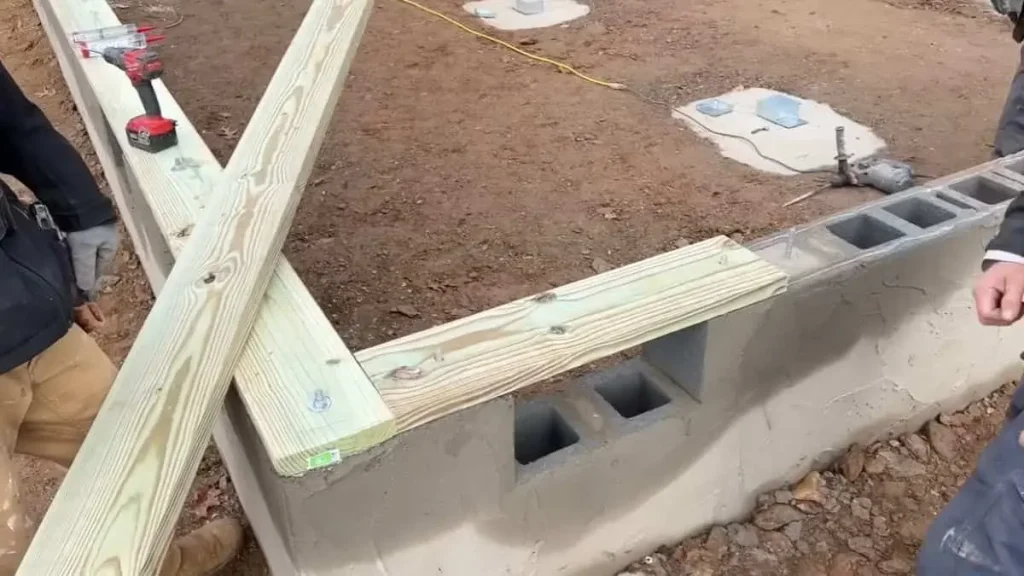
Proper positioning of the joists is essential for a stable floor. Start by placing the first joist at one end of the sill plate. Ensure the joist is flush with the edge of the sill plate.
Use a level to make sure the joist is perfectly vertical. Adjust as needed to ensure accuracy. Once the first joist is in place, move on to the next one.
- Place the first joist flush with the sill plate edge.
- Use a level to ensure it’s vertical.
- Repeat with the remaining joists.
Maintain equal spacing between the joists. Typically, joists are spaced 16 inches apart, center to center. Use a tape measure to mark the positions on the sill plate.
Check the alignment of all joists once they are positioned. Adjust if needed to ensure they are straight and evenly spaced. This will help distribute the load evenly across the floor.
Nailing The Joists To The Sill Plate
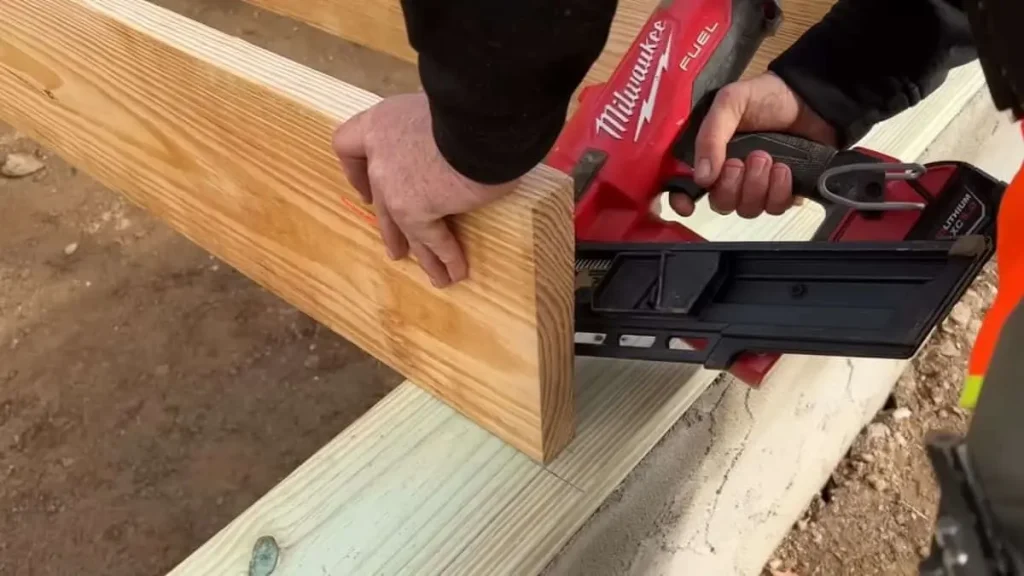
Nailing the joists securely to the sill plate is the final step. Use galvanized nails to prevent rust and ensure durability. Start by driving a nail at an angle through the side of the joist into the sill plate.
Use a hammer or a nail gun for this task. A nail gun can speed up the process and provide consistent results. Place two nails at each end of the joist to secure it firmly.
- Use galvanized nails for durability.
- Drive nails at an angle through the joist into the sill plate.
- Place two nails at each end of the joist.
Ensure each joist is tightly secured to prevent any movement. Check the stability by applying pressure to the joists. They should not shift or wobble. If any movement is detected, add additional nails for extra security.
Once all joists are nailed, double-check the alignment and spacing. Make any final adjustments as needed to ensure a solid and stable floor frame.
Alternative Methods Of Attaching Floor Joists
While traditional methods often involve using nails or screws, several alternative methods can provide enhanced strength and durability.

Using Metal Connectors
Using metal connectors offers a reliable method for attaching floor joists to the sill plate. These connectors, made of galvanized steel, offer excellent durability and resistance to corrosion. They ensure a secure and stable connection between the joist and the sill plate.
Here are some benefits of using metal connectors:
- Enhanced Strength: Metal connectors provide a stronger connection compared to traditional nails.
- Corrosion Resistance: Galvanized steel resists rust, ensuring long-term stability.
- Easy Installation: Pre-drilled holes make it easy to align and attach the connectors.
To install metal connectors, follow these simple steps:
- Place the metal connector over the sill plate and align it with the joist.
- Insert screws or nails through the pre-drilled holes in the connector.
- Ensure the joist is flush with the sill plate and secure all connections.
Metal connectors come in various shapes and sizes. Choose the type that best suits your project needs. Refer to the table below for common types of metal connectors:
| Type | Description |
| Angle Brackets | Ideal for right-angle connections between joist and sill plate. |
| Flat Plates | Used for flat connections, providing additional support. |
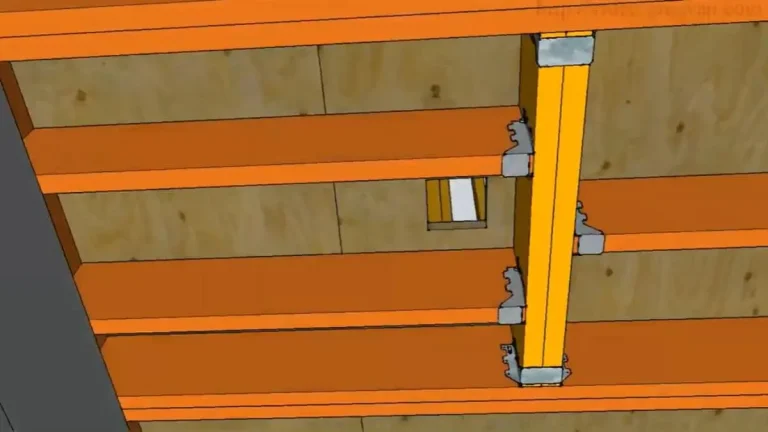
Using Joist Hangers
Joist hangers provide another effective method for attaching floor joists to the sill plate. These hangers cradle the joist, offering superior support and stability. Made from galvanized steel, they resist corrosion and ensure long-lasting performance.
Here are some advantages of using joist hangers:
- Improved Load Distribution: Joist hangers distribute the load evenly across the joist and sill plate.
- Reduced Joist Movement: Joist hangers minimize lateral movement, enhancing structural integrity.
- Easy Alignment: The design of joist hangers makes it simple to align and install the joists.
Follow these steps to install joist hangers:
- Position the joist hanger on the sill plate where the joist will sit.
- Secure the hanger to the sill plate using nails or screws through the pre-drilled holes.
- Place the joist into the hanger and secure it with additional nails or screws.
Joist hangers come in various styles to fit different joist sizes. Refer to the table below for common types of joist hangers:
| Type | Description |
| Face Mount Hangers | Attach directly to the face of the sill plate for easy installation. |
| Top Mount Hangers | Provide additional support by attaching to the top of the sill plate. |
Tips For Successful Installation
Here are some essential tips for success to help you achieve the best results.

Checking For Level
Before attaching floor joists to the sill plate, always ensure that the sill plate is level. This step is crucial for creating a stable foundation.
- Use a long level: A long level provides a more accurate reading across a wider area.
- Check multiple points: Place the level at different points along the sill plate to ensure evenness.
- Adjust as needed: If you find any uneven spots, use shims to correct them.
Here’s a simple table to help you understand the tools needed for checking the level:
| Tool | Purpose |
| Long Level | To check for evenness along the sill plate |
| Shims | To adjust any uneven spots |
Ensuring the sill plate is level prevents future issues with floor stability and alignment.
Using Adequate Support
Adequate support is essential for a strong floor structure. Use temporary supports during installation to hold the joists in place.
- Install temporary braces: These hold the joists in place and prevent shifting.
- Use joist hangers: Joist hangers provide additional support and ensure a secure attachment to the sill plate.
- Check spacing: Ensure joists are evenly spaced for uniform load distribution.
Here’s an outline of the steps involved:
- Install temporary braces to hold the joists.
- Use joist hangers for extra support.
- Check the spacing between joists.
Using adequate support ensures that the floor remains stable and secure over time.
Using Proper Nails
Choosing the right nails is crucial for attaching floor joists to the sill plate securely. Incorrect nails can lead to weak connections and potential floor failure.
- Use galvanized nails: These nails resist rust and corrosion, ensuring a longer-lasting connection.
- Select the correct length: Use nails that are long enough to penetrate both the joist and the sill plate securely.
- Space nails evenly: Ensure nails are evenly spaced along the joist for uniform support.
Here’s a quick reference guide for nail selection:
| Nail Type | Purpose |
| Galvanized Nails | Resist rust and corrosion |
| Correct Length Nails | Securely attach joist to sill plate |
Using the proper nails ensures a strong, secure connection between the floor joists and the sill plate.
Safety Precautions
Attaching floor joists to a sill plate is crucial in building a sturdy floor structure. Ensuring the process is done safely is vital to avoid injuries and ensure a solid build. Here are some key safety precautions to follow:

Wearing Protective Gear
Always wear protective gear to safeguard yourself from injuries. Essential items include:
- Safety glasses: Protect your eyes from flying debris.
- Gloves: Prevent cuts and splinters.
- Hard hat: Protect your head from falling objects.
- Ear protection: Reduce noise exposure from power tools.
- Steel-toe boots: Shield your feet from heavy objects.
Here’s a quick overview of the protective gear:
| Gear | Protection |
| Safety glasses | Eyes |
| Gloves | Hands |
| Hard hat | Head |
| Ear protection | Ears |
| Steel-toe boots | Feet |
Always inspect your gear before use to ensure it’s in good condition. Replace any damaged items immediately. Wearing the right protective gear significantly reduces the risk of injuries.
Using Power Tools Safely
Power tools make the job easier but can be dangerous if not used correctly. Follow these guidelines:
- Read manuals: Understand the tool’s operation and safety features.
- Inspect tools: Check for damage before use.
- Use guards: Always use safety guards provided with the tool.
- Keep a clean workspace: Remove any clutter that might cause accidents.
- Wear appropriate clothing: Avoid loose clothing that can get caught in the tools.
- Disconnect power: Unplug tools when not in use or when changing accessories.
Always follow these safety tips to avoid accidents and ensure a safe working environment. Safety is paramount in any construction project.
Conclusion
Attaching floor joists to a sill plate is crucial for a strong foundation. Follow the steps carefully for a secure attachment. Proper alignment and fastening ensure stability and longevity. Always use quality materials and tools. Your home’s safety depends on these connections.
Now, you can confidently complete your flooring project.